

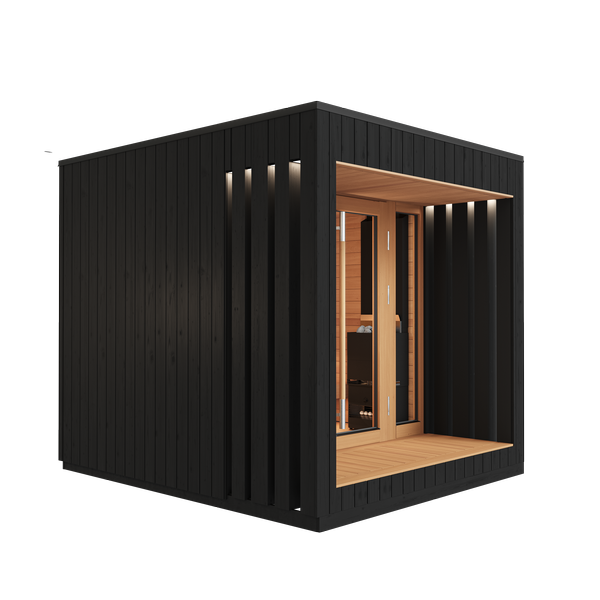


Owning a home sauna is one of the best investments you can make for your health and well-being, but like any space you use regularly, it needs consistent care to stay safe, hygienic, and performing at its best. Whether you have a compact indoor sauna in your basement or a dedicated steam room, a straightforward maintenance routine will protect your investment and keep every session feeling as good as the first.
The good news is that maintaining an indoor sauna isn’t complicated. Most of the work comes down to regular cleaning, occasional inspections, and knowing when a component needs attention. This guide walks you through every key maintenance question so you can keep your sauna in top condition for years to come.
How often should you clean an indoor sauna?
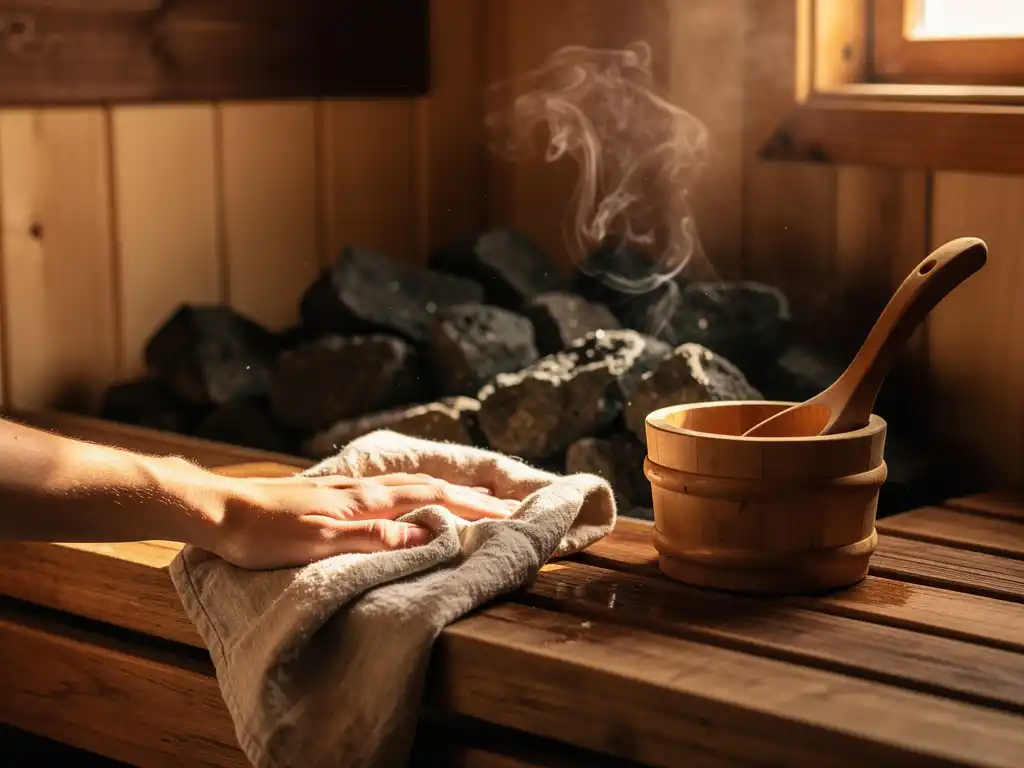
You should wipe down sauna benches and surfaces after every use, do a deeper clean of the entire interior weekly if the sauna is used frequently, and perform a thorough deep clean—including the floor and walls—at least once a month. The frequency scales with how often the sauna is used and how many people share it.
After each session, a quick wipe with a clean, dry towel removes sweat and moisture from the benches before it soaks into the wood. This single habit prevents most odor and staining problems. For households using the sauna several times a week, a light scrub of the benches with warm water and a mild, non-chemical cleaner once a week helps prevent bacteria from building up.
Monthly deep cleaning should cover the floor, lower walls, and the area around the heater. Sweep out any debris, check for mold in corners, and rinse the floor with clean water. Avoid harsh chemical cleaners inside the steam room, as residues can release unpleasant or harmful fumes when the room heats up.
What’s the best way to clean sauna wood and benches?
The best way to clean sauna wood and benches is to scrub them with a soft brush, warm water, and a small amount of mild soap or a dedicated sauna cleaner, then rinse thoroughly and allow the wood to dry completely before the next session. Always scrub along the grain to avoid damaging the wood fibers.
Sauna wood—typically spruce, aspen, or cedar—is untreated and porous by design. This means it absorbs moisture and sweat quickly, which is why prompt drying after each session matters so much. Never use abrasive scrubbers or bleach-based products, as these strip the natural wood surface and can leave chemical residues that become irritating at high temperatures.
For stubborn sweat stains, a paste made from baking soda and water and applied with a soft brush works effectively without damaging the wood. After scrubbing, rinse with clean water and leave the sauna door slightly open to allow full ventilation and drying. A well-ventilated sauna dries much faster and is far less likely to develop mold or mildew between sessions.
How do you maintain an electric sauna heater?
Maintaining an electric sauna heater involves inspecting the heating elements and stones regularly, keeping the area around the heater clear, checking electrical connections periodically, and ensuring the unit isn’t overloaded with water during sessions. Most electric-heater maintenance is visual and straightforward.
Regular visual inspections
Before each session, take a quick look at the heater to confirm nothing has fallen onto or into the stone basket and that there are no visible cracks or damage to the casing. After sessions where water was ladled onto the stones, check that water hasn’t pooled around the base of the unit, as standing water accelerates corrosion on components not designed for constant immersion.
Electrical components and safety
Electric sauna heaters should be inspected by a qualified electrician every few years, particularly the connections, fuse ratings, and cable integrity. If the heater takes noticeably longer to reach temperature than it used to, this can indicate aging heating elements or a wiring issue worth investigating. Never attempt to repair heating elements yourself. Always follow the manufacturer’s recommended safety clearances around the unit.
For heaters with integrated climate systems, such as those from Saunum, the fan and ventilation components also benefit from an occasional check to ensure the air intake is free of dust and debris. A blocked intake reduces the efficiency of the air-blending system and sauna technology and can cause the unit to work harder than necessary.
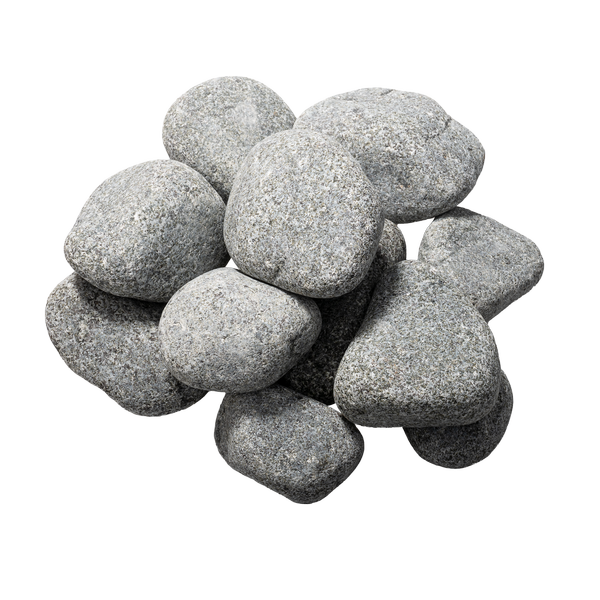
When should you replace sauna rocks?
Sauna rocks should be inspected every six to twelve months and replaced when they show visible cracking, crumbling, or significant flaking. Rocks that have deteriorated release dust and particles into the steam, which you then breathe in, so replacing them promptly is both a performance and a health consideration.
Over time, the repeated thermal cycle of heating and water contact causes even high-quality sauna stones to break down. You’ll notice the signs clearly: stones that crumble when handled, a gritty layer of debris at the bottom of the stone basket, or a noticeably dusty smell when water hits the stones. These are all signals that it’s time for fresh rocks.
When replacing rocks, remove all the old stones and clean the stone basket thoroughly before adding new ones. Choose stones specifically rated for sauna use, such as olivine diabase or peridotite, which handle thermal shock well. Arrange them so there is space between them for airflow and steam distribution, rather than packing them tightly. For heaters with a dual-level stone-basket design, follow the manufacturer’s guidance on layering to get the best heat retention and even steam distribution.
What causes sauna temperature problems and how do you fix them?
The most common cause of sauna temperature problems is poor heat distribution, where the air near the ceiling is dangerously hot while the lower seating area stays too cool. Other causes include undersized heaters, poor insulation, and blocked ventilation. Most issues can be diagnosed and corrected without professional help.
Temperature stratification
In a conventional sauna, hot steam rises and accumulates at ceiling level, creating a significant temperature gap between the top and bottom of the room. This is not just uncomfortable; it can also mean the air near the floor is lower in oxygen while the steam above is too intense to enjoy. Improving ventilation, adjusting bench height, or adding an air-circulation device can address this directly.
Heater sizing and insulation issues
If your sauna takes too long to reach temperature or never quite gets there, the heater may be undersized for the room volume. Non-insulated surfaces like glass doors, brick walls, or concrete floors all increase the effective volume the heater needs to warm. As a rule, each square meter of uninsulated surface adds to the load the heater must handle, so accounting for these surfaces when sizing a heater is essential.
Poor door seals are another frequent culprit. A sauna door that does not seal properly bleeds heat continuously, making it nearly impossible to maintain a stable temperature. Replacing the door seal is a simple fix that makes an immediate difference in both temperature consistency and energy efficiency.
How do you protect sauna wood for long-term durability?
To protect sauna wood for long-term durability, ensure thorough drying after every session, maintain good ventilation, use sauna-specific wood treatments sparingly on exterior surfaces only, and address any signs of moisture damage or mold immediately. The interior wood should generally remain untreated to preserve breathability and avoid chemical off-gassing.
The interior benches and walls of a steam room are intentionally left unsealed so the wood can absorb and release moisture naturally. Applying varnish or standard wood stains to these surfaces traps moisture inside the wood, leading to faster deterioration and potentially releasing harmful vapors when heated. If the wood looks dry or gray over time, this is normal and does not indicate damage.
For the exterior of the sauna cabin or the outer faces of the door, a breathable wood oil or exterior treatment appropriate for high-humidity environments can extend the life of the structure. Inside the room, the best protection is simply keeping the space clean, dry between uses, and well ventilated. Leaving the door ajar after each session allows residual moisture to escape rather than settling into the wood overnight.
How Saunum helps maintain a consistent and comfortable indoor sauna
One of the biggest maintenance headaches in any indoor sauna is not the cleaning routine but the underlying performance issue of uneven heat and poor air quality. When steam piles up at the ceiling and the lower benches stay cool, the sauna is harder to enjoy and harder to manage. We designed our products specifically to solve this problem at the source.
Saunum’s patented air-blending system captures the scorching steam near the ceiling and mixes it with the cooler, oxygen-rich air near the floor, circulating it evenly throughout the room. This means:
- A consistent temperature from floor to ceiling, so every seat in the sauna is usable
- Softer, longer-lasting steam that is easier to breathe and reduces post-session fatigue
- The ability to ladle water more frequently without creating an unbearably intense burst of heat
- Himalayan salt spheres integrated into the climate device, which enrich the circulating air with beneficial salt ions
Whether you are building a new home sauna or upgrading an existing setup, Saunum offers solutions that fit. The Saunum Base sauna heater adds our air-blending technology to any existing heater without requiring a full replacement. For new builds, the Saunum Experience and Spa Session integrate the heater and climate system into a single, streamlined unit. The Saunum Leil smart controller lets you schedule sessions, monitor temperature remotely, and manage every setting from your phone. Visit our full sauna product shop to explore the full lineup and find the right fit for your sauna space.
If you’re interested in getting started with Sauna, check out our full range today.


